How to Build a Website on Wordpress from Scratch
From choosing a hosting plan to publishing the first page of a new website for the first time EVER
ALL ABOUT BLOGGINGONLINE BUSINESS
How to Build a Website on Wordpress From Scratch
Building a Website
To build a Wordpress website from scratch can feel pretty daunting. Especially, if like me, you have never created a website before! You probably have lots to write about, or you may have already written content and need somewhere to put it! It’s time to start building a website for you blog! It took me a while to get a website up and running. It’s scary to think about putting yourself out there right!? But here you are on my website, reading my content WOOHOO!
Just a head’s up, this page is quite a long read and may seem overwhelming! Feel free to bookmark it so you can read it bit by bit and use it as a guide when building your own website! I am also going to be talking from my experience of creating my first website in which I used wordpress and the theme Astra so some elements may be different if you are using a different theme or website builder. (or maybe even this sounds alien to you, don't worry I will explain what all of these things are below!)
** UPDATE - since originally posting this blog post I have moved from GoDaddy to Hostinger and have now used the Hostinger website builder instead of wordpress. All content is correct at time of writing but as I will no longer be updating this post some costs/aspects may differ to your experience! **
Watch out for my current and up to date blog post of similar content about my current website building platform.
What Will Be Covered In This Post
Free Hosting
Hosting
What is Hosting?
Hosting or web hosting is the platform on which your website is stored. Purchasing a hosting plan is one of the first steps in building a website from scratch. When you purchase a hosting plan you are essentially paying to use space on the hosting platforms server to store your websites data and files.
If you plan to monetise your blog or use your website to provide affiliate links, it’s really important to get that you don't use free hosting! Yes, there are a lot of free website builders but they come with the following downfalls:
Your website name looks unprofessional www.wealthtowander.wordpress.com
You don’t own your website
You aren’t able to use affiliate links and therefore you can’t make money from your website
With paid hosting, you own the website and it’s content. You don’t get a long winded website address and you can use affiliate links which may be a way you are monetising your blog or creating an online income.
What is a Domain?
This is simply your website name. For example here my domain is ‘wealthtowander.com’
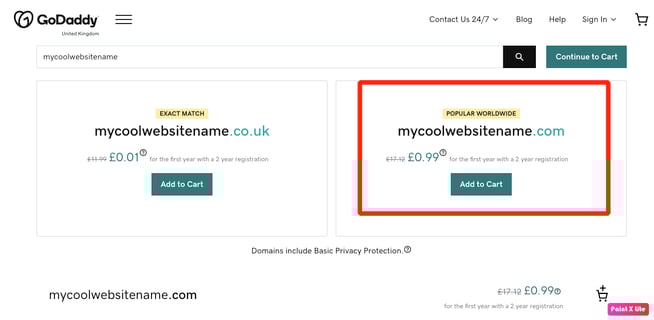
When you build your Wordpress website you will want to make sure the name you choose is available to buy/register. To do this you can search the name availability. Websites such as Godaddy or Bluehost allow you to do this and then purchase your domain name through their hosting platform.
It’s really important to try and make sure you can get the .com version of your site. Make sure you have a few names to play with just in case the .com version isn’t available for your first choice!
Domain and Hosting Costs
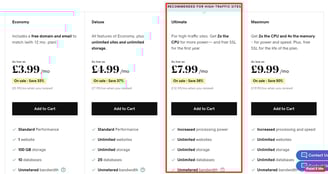
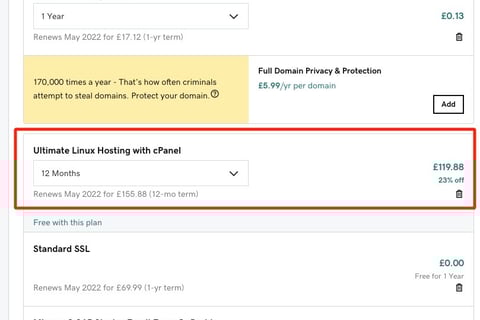
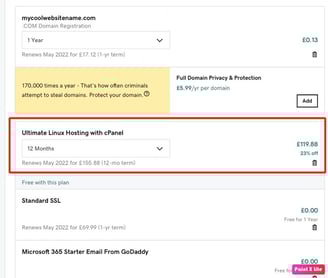
The plan I have with Godaddy is the 'ultimate plan' and cost around £150 for the year. The domain is included for free in the first year in this plan. This also includes a linked email address and an SSL certificate free for a year (don’t worry I’ll explain this in a moment!). A linked email is great as it is more professional and allows you to keep your personal email and business accounts separate.
Most hosting platforms have good introductory offers which could include a free domain, a free email or reduced cost of your hosting plan for the first year so it can be worth having a look at a few different hosting platforms. The most common ones I have come across have been godaddy, bluehost and hostinger so it may be worth checking them all out for the best offer!

The SSL certificate is also really important. It is a security certificate ensuring that any information people put into your website (such as an email address) is stored securely. It does this by encrypting the information. I’m sure you will have noticed the little padlock in the website address bar. If the website you are on is secure with a valid SSL certificate this padlock will be locked. This is also important for google rankings as google isn’t the biggest fan of unsecure sites.
So what am I paying for if these things are free? The £150 cost covers the hosting plan. The hosting plan is essentially space on the server (in this case on Godaddy's server) to store your files (your website). Your website is the house and the hosting plan is the land you put your house on.
Once you’ve got your hosting plan set up, you can install Wordpress and this is the tool you use to build everything on your website! With Godaddy it was as simple as clicking ‘install Wordpress’ and within minutes I was good to go.
Now the above process of setting up Godaddy and Wordpress was pretty simple but I did follow a step by step guide from within the affiliate marketing course I invested in ‘Freedom Affiliate’ which was really helpful. The idea of setting up a website was really scary so to have that support made the whole process a lot less daunting! You can sign up to the free masterclass for the course I am taking here.
Jump forward 24 hours and I’m thinking about getting home form work and building my website.
HOW EXCITING.
Except whilst at work I start getting emails telling me there have been 12 failed log in attempts to my Wordpress site and it has now been blocked for 20 minutes. Another email saying there were 16 attempts and it was blocked for 24 hours. And another 5 or so emails saying similar things.
WHAT!? I only bought my domain less than 24 hours ago how does anyone even know it exists let alone want to hack it!? I am about to build a Wordpress website from scratch, there is nothing on it yet!
Sure enough when I get home I log into Wordpress and it tells me there has been a brute force attack on my website. Brilliant. I spent that evening changing my passwords and researching how to secure my site.
2 factor authentication
That seems to be everyone’s answer. I have it for my banking where it sends me a one time passcode so it should be easy. Ok cool lets set that up.
I need a security plugin.
A what?
Domians
A Plugin
A plugin is a bit like an app which allows your website to do more things. For example there a plugins which allow you to add image slideshows to your website, plugins to allow you to add fancy fonts to your website, and plugins to help enhance the security of your site.
I really never knew how much I would accidentally learn on this journey, but I’m here for it! And since building a website on Wordpress from scratch, I can at least share these learnings with you!
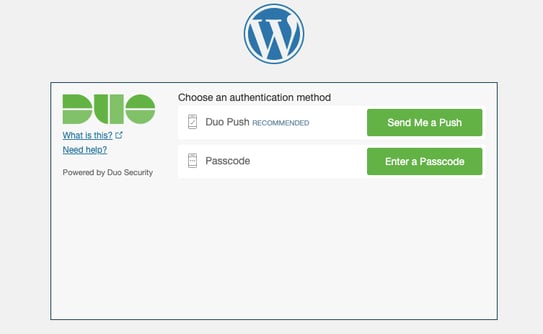
So as you’re probably getting to know with me, I researched haha! I researched the best 2 factor security plugin.. there are loads to choose from and some of them do all sorts of fancy things but I just wanted something basic. The google one seemed popular but I read a few bad reviews so I settled on DUO and it’s super easy to set up. Now I have an app downloaded to my phone so whenever I log into Wordpress it just sends a push notification to my phone, I click approve and I’m in. Since then I’ve had no crazy attacks and attempted logins to my site so it must be working!

Build a Wordpress Website from Scratch
STEP ONE login to Wordpress, good, I know I can do that.
STEP TWO Approve log in via duo notification. Sweet we’re in.
STEP THREE Stare blankly at Wordpress
I literally spent two days of staring at Wordpress, clicking a few buttons and thinking HOW THE HELL DO I USE THIS. It was totally alien and I literally didn’t know where to start.
‘But you’ve paid for a course that teaches you how to do this?’ I hear you shout.
In previous posts I have mentioned the two courses I am following to help me with this process. One is a free course about how to monetise a blog whilst, the other is a paid affiliate marketing course. This was the first point in which the focus of the two courses was slightly conflicting. Let me explain how through the first steps of how to build a website on Wordpress from scratch.
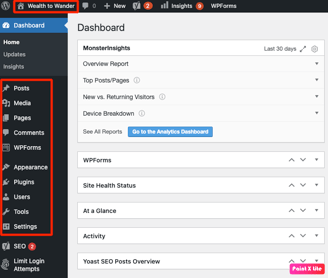
Wordpress Dashboard
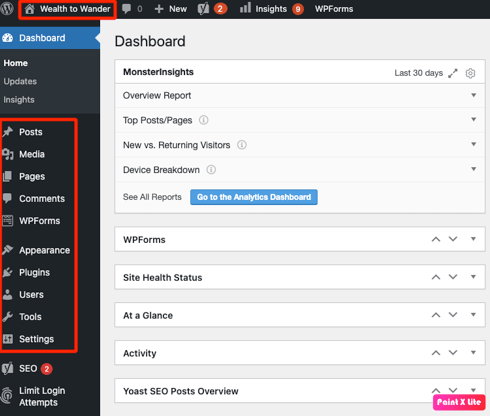
Understanding where to find things is going to be key when you build a website from scratch on wordpress. I would encourage you to take sometime to look around the dashboard and see where to find things and just generally get used to it!
Website name - to view your website
Posts - to see and edit blog posts
Media - to see and edit your images and videos
Pages - to see and edit your website pages
Comments - to moderate comments
Appearance - to add and edit themes and design
Plugins - to add and update plugins
Settings - main settings
Page Builders and Themes in Wordpress
What is a Theme?
A theme is essentially the design of your website. Within a theme you can then pick a template for your home page, blog posts, contact page etc and simply edit the text and pictures at the most basic level. Everything else is done for you, fonts, colours, menus, the lot. It eliminates the need to know any coding (thank goodness), and essentially leaves you with a professional looking website. However, as I have found, even editing just text and images on wordpress can be a little fiddly, so some people choose to use page builders on top of their theme to make this easier.
What is a Page Builder?
Page builders simplify the process of building a website from scratch. They have templates you can start out with but they also make it easy to edit the entirety of a template allowing you to simply drag and drop items where you want them on the page. Page builders you might come across are Elementor, Beaver builder and Divi. These page builders are also used as plugins just like the security feature I added.
On the affiliate marketing course I am working my way through, Divi is recommended. This is a paid page builder and it really does make some pretty beautiful sites.
Sounds great right? So why don’t I use one?
Through both my own extensive research, as well as advice given on the free blogging course I was following, I learnt that using a page builder has quite a negative impact on site speed.
Why does site speed matter?
Site speed can affect your rankings on google. No one likes a slow loading website do they? How often do you click on a site and if it takes longer than a few seconds to load you click off of it and move onto the next one? I know I do! Slow loading pages also negatively impact SEO (search engine optimisation) which is something I have been trying to get right from the get go. I talk about SEO a little in this post here as well as in this entire post dedicated to the key elements of SEO.
I made the decision not to use a page builder and to go it alone, picking a free theme and editing templates myself. On the blogging course there are a couple of free themes recommended. I chose to use ‘Astra’ seeing as though it always comes out on top for site speed and I didn’t feel my website needed to be too fancy at the moment! This did mean I would have to continue to build my Wordpress website from scratch (mostly), potentially making it a little more difficult. But I was up for the challenge! It is ultimately totally up to you whether or not you use a page builder to make life a little easier!
Installing a Wordpress Theme
Where were we? Oh yes, I spent two days clicking around Wordpress and not having a clue what anything did. I took a day away from it and went back with a fresh head.
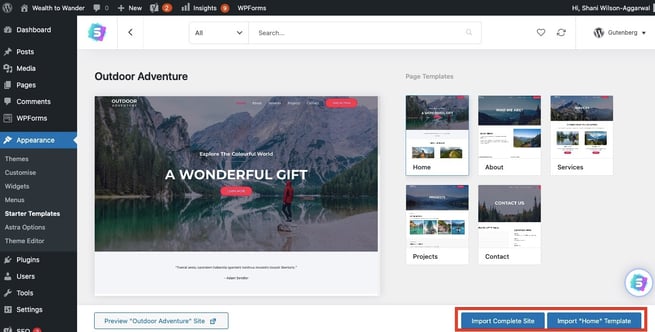
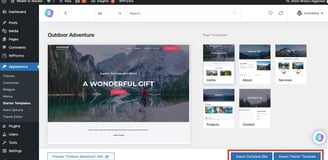
I watched a couple of youtube tutorials specifically about how to install the astra theme, how to choose templates and how to begin editing. The one that really got me off the floor was this youtube tutorial from Ferdy Korpershoek... THANK YOU!!!
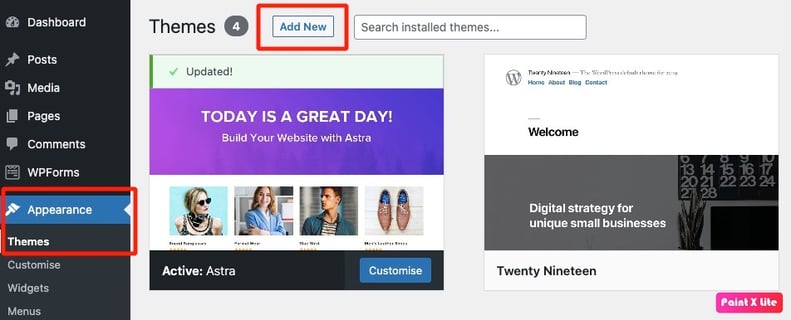
On the left hand side of your wordpress portal hover over appearance and click 'themes'.
Click 'add new' and then you can browse the themes or if you know which one you want you can search the name of it. Click install on the theme you like and then you can activate it to use it.
I also downloaded a plug in called starter templates which gives you loads of free templates to use so you don’t ALWAYS feel like you're starting from scratch … that blank page is scary at first! You can then input your content directly onto the pre designed template (I started with these for my home and about me pages until I got to grips with it). You can also start from scratch as I now do with my blog posts. I copy my written content over form a word document and then edit the appearance and add images.
Logo and Colour Scheme
One of the first things the youtube tutorial shows is how to edit is the top banner on your page and how to add a logo. A LOGO. Great idea! I don’t have one of those. I need to make one of those. If i am going to build a Wordpress website from scratch I might as well go all out and have a logo to go with it right!?
4 hours later I had the wealth to wander banner. 4 HOURS!? Don’t panic, its really not that complicated and there are loads of free templates you can use - anything arty and creative is just not my forte and takes me ages! I spent a lot of time playing with colours, shapes and fonts, THERE ARE SO MANY FONTS.


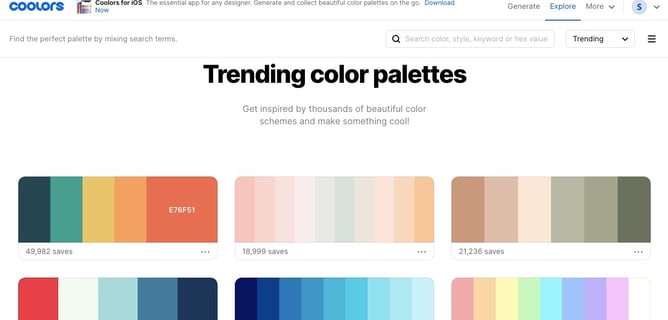
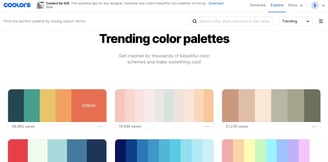
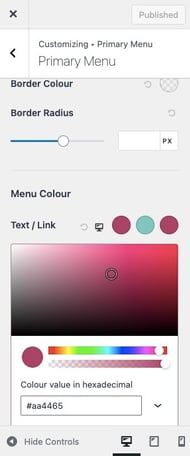
I used canva – a free stock image website. After looking at some of the templates I decided I just didn’t like any of them. So I created my own. I decided on a colour scheme I wanted for my website in general and used an amazing website to help me with this called coolors.co. It has ready generated colour palettes or you can create you own and I did have a lot of fun with this. Each colour has a code and you simply copy the code and paste it into the colour picker on Wordpress and it finds the exact colour, its so easy and I was particularly impressed by this! I saved the ones I like to the free account I created and those are the colours you see used all over this site :)
Anyway, I carried on working through the youtube tutorial (until I got bored!) Then I just spent a few days clicking different menus, selecting different settings and seeing how they affected the layout of the site and the content. There is a great button at the top of the page editor which says preview ‘in a new tab’. The amount of times I would click that to see what my website was looking like is borderline insane!


Customising vs Editing in Wordpress
This chunk of writing you are reading now has been edited on the edit page area. The heading which says 'how to build a website on Wordpress from scratch', the text, the photos and links, are all added and edited for each page individually. This means you can make the page look however you like. You will see on my home page I added a button to take you to my about page. On the about page I chose different colours to have behind certain boxes of text. On my contact page I added a contact form.
Mobile, tablet or desktop
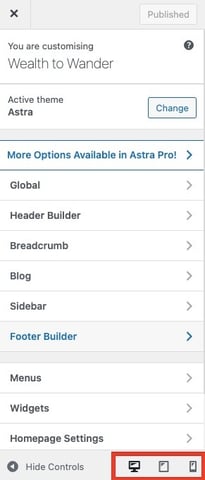
Make sure that when you are building your website, you do regular preview checks in all 3 different modes. As you edit the position of a heading in desktop view it might make it look wonky in mobile view. You can check this by previewing in each of the different modes and you can also edit in each of these previews. This can be found on the top right of the screen by clicking preview.
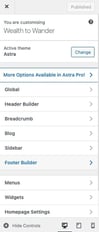
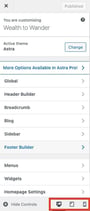
Similarly you can see each of these views on the customiser page in the bottom left corner. My advice would be to make sure you check each preview regularly and edit accordingly. So many people use their phones and tablets these days so it is important to make sure these versions are user friendly!!
Customising your website has a different function to editing a page on your website.
But they sound like they should do the same thing right?
The main difference is that customisation is about elements across the whole of your site, whereas editing is changing elements of the specific page you are working on.

Editing
Customising
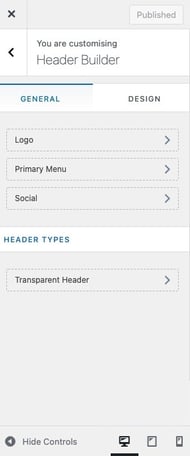
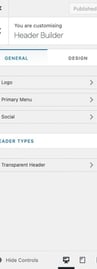
Customising the website means that all of the set features will be the same on every page. What do I mean by that? At the top of this page there is a header. This contains my logo, a menu to navigate different areas of the site and my social media links. It also has a breadcrumb trail so you can see how you got to this page. This area is edited in the CUSTOMISER area of Wordpress and it stays the same on every page.
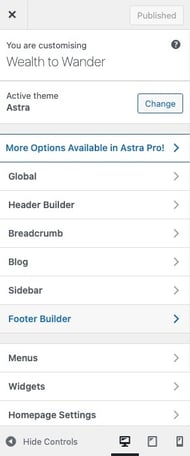
This is the same for the footer you can see at the bottom of the page. It contains another menu, social media links and a copyright. On the customiser page you can edit both the header and footer individually. You can choose the layout, colours, fonts and menus and these will be the same on every page, keeping everything uniform across your site. You can even edit the small details. Like hyperlink font colour and hover colour.
So there you have it, the very basics of starting to build a website from scratch on wordpress. I hope this is helpful and gives you some guidance so that you don't feel as overwhelmed as I did to begin with! The next step is to start creating your pages and posts and editing them! This brings a whole new learning experience, one that continued to baffle me! However, patience is the key and remember it is all a learning process, these are completely new skills! Read on to start adding your content to your site and hopefully the info below makes it a little easier for you!
Adding Content
So that you don’t spend two days staring at a screen and getting nowhere I would encourage you to watch a couple of youtube tutorials. As I have only used astra I can’t say whether or not the following information is transferrable to other themes. I just wanted to highlight a few functions I use most frequently when editing to try and make it a bit easier for you if you’re new to Wordpress and website building!
Pages vs Posts
What is the difference between a page and a post? When it comes to editing there is little to no difference. The most simple way to explain it is that a page is a stand alone element like a home page, about me page or contact page. Your posts however would be your blog posts. Pages tend to have a little more creative design whereas posts are centred around text and kept quite clean and simple. With blog posts you can categorise them and produce archive pages showing all the posts from a category.
Adding a Page
On the left side menu on the Wordpress dashboard, hover over appearance and click starter templates. Alternatively you can hover over pages, click add new and then click starter templates on the top banner. Both routes get you to the same place. Browse the templates until you find one you like. You can either import the whole site (some templates may have about me, blog and contact pages), or you can import the individual page you want. I imported mine individually as it felt less overwhelming working on one page at a time. Once imported it should appear on your pages tab and from there you can get to the page editor.


Adding a Post
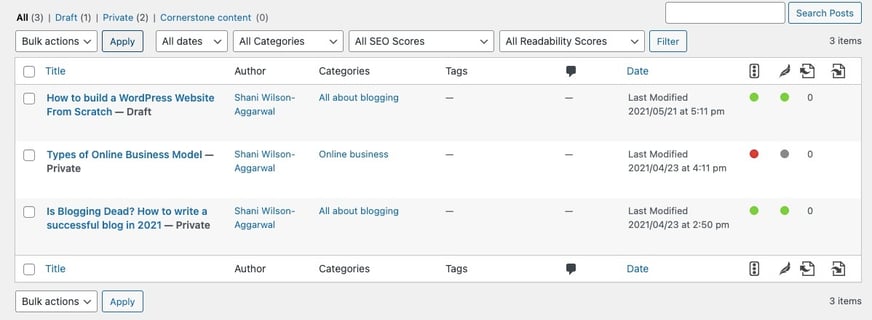
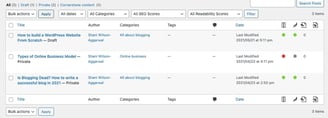
Very similar to adding a page, hover over posts and click 'add new'. Your posts, whether published or draft, will then show as a menu and you can click each one to either edit or preview. You can also see here which category each post is in.
Editing Content
This is where I got stuck...again. I kept clicking things and I could edit text and change the images but I couldn’t move them or do anything else with them. Here are a few ways to make the page easier to navigate. Note: this is a block editor (you will understand why this matters shortly!)
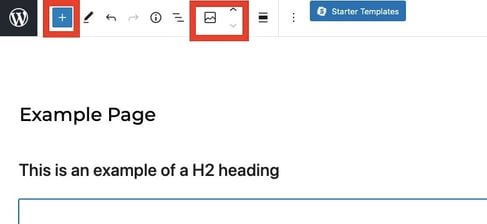
Pin the tool bar
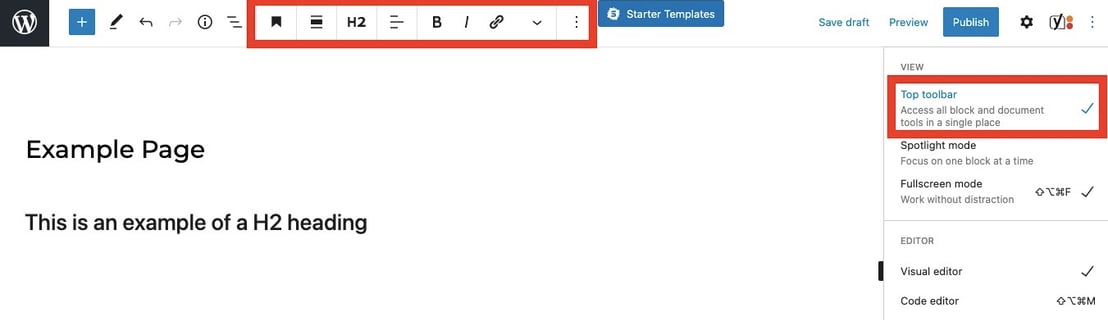
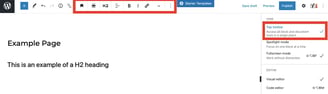
To begin with I found editing really difficult. Wherever I clicke dont he page the edit toolbar would appear and often this would cover the exact thing I was trying to edit which was really awkward and fussy, it just kept getting in the way! A few hours in, I found that I could pin the tool bar to the top of the page so it appeared in on place out of the way when I clicked areas to edit... this was much easier! To do this click the three little dots in the top right hand corner and click ‘top toolbar’. Once I found this I was getting less annoyed straight away! With this toolbar you can edit text sizes, colours, change images and alignments of blocks.
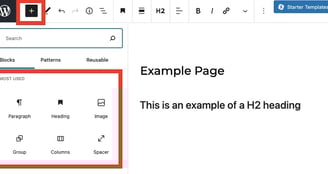
Adding a Block
What is a Block?
Blocks are essentially the different elements on your page. There are all different types of block and so far I have really only used the most basic ones:
Cover (image with writing over the top – used at the top of my Home page)
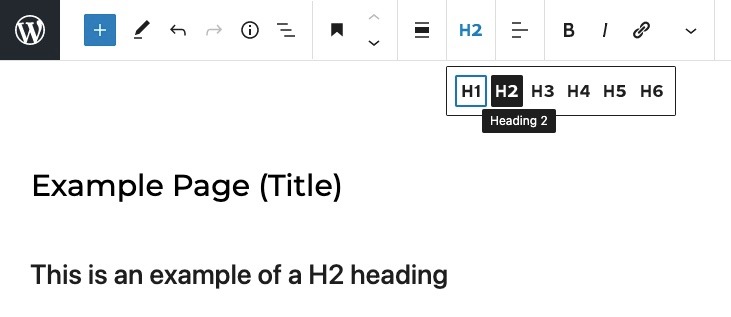
Heading (H1 used on the cover, H2 used for titles, H3 for subheadings etc)
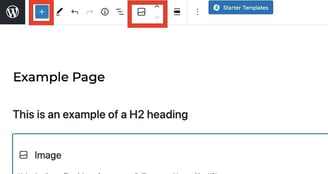
Image
Media and text
Paragraph
Columns
Spacer
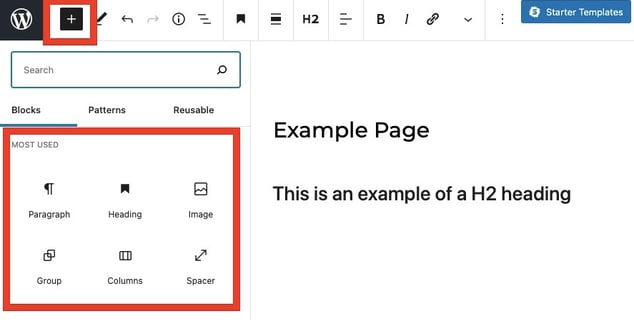
To add a block you will use the little blue plus square on the top right hand corner and choose what typw of block you want to add. You can move the blocks up and down the page using the up and down arrows in the top toolbar.
Show More Settings
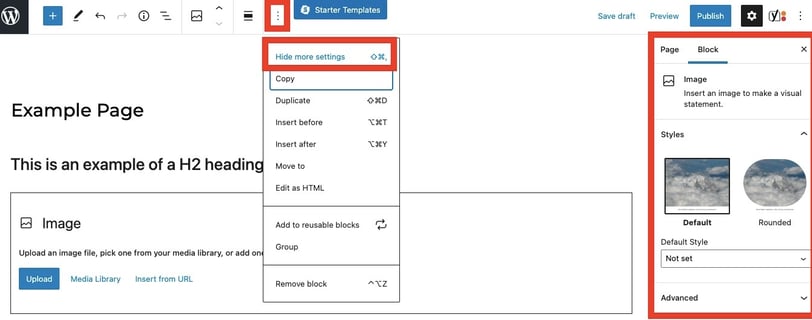
This one is pivotal to editing as I found out – particularly with images and changing background colours! When you first go to edit your page you may simply see the website page. If you click on any element of the page, whether it be an image or a heading, you will want to see the settings bar appear on the right hand side. If it doesn’t do this you can either click the cog wheel in the top right hand corner or on the top pinned toolbar you can click the three vertical dots and click ‘show more settings’.

VIOLA!
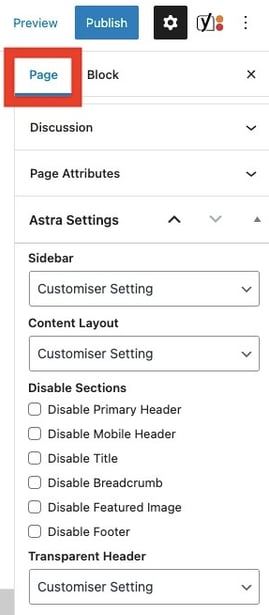
You’ll see that the settings bar has two tabs, page/post and block. The page/post tab is the general settings. This is where you can disable your title (see below), add a featured image and I also disable transparent header. A transparent header basically means that the white strip at the top of my page with my logo and menu sit over the image rather than above it. If you tend to use colourful and busy images your menu and logo can easily get lost so it may be better to disable this option. Again this is just something that comes down to your design preference.
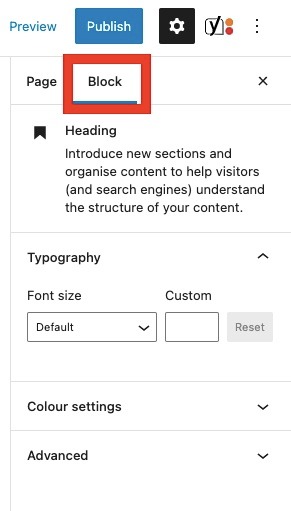
The block tab allows you to edit the specific item you have clicked on. If it is a text box such as a paragraph or heading you will be able to change the text and background colour. You can also change the font size here if you want a heading to be in a particularly small or large font. You will see from the image below that mine says 'default'. This means the options I chose for 'global typography' on the customiser menu will automatically be applied unless I specify a different sized font. If it Is an image it will allow you to change the focal point of your image. This is essentially choosing which part of the image is displayed. You can add an overlay to make your image lighter or darker (this can be useful to make all your covers more uniform).
Titles and Headings
I always include a page or post title when I start a new page so that when I save it I know which page/post is which. This seems obvious but you won’t actually see this title on my site. What you see when it says ‘How to build a website on Wordpress form Scratch’ is a heading not the post title.
Have I confused you?
Page titles and headings are different. The page title is what the page or post is saved as and yes you can have this showing, however I disable mine in the side setting bar as I mentioned previously and choose to create a nice big banner heading instead. Headings are also different to text – they have an impact on SEO. H1 headings are the biggest ones so usually used as the page title and should contain your keywords (recap on importance of your keywords here and their impact on SEO here). H2 would then be titles of your post, whilst H3 would be subheadings and so on.
Groups
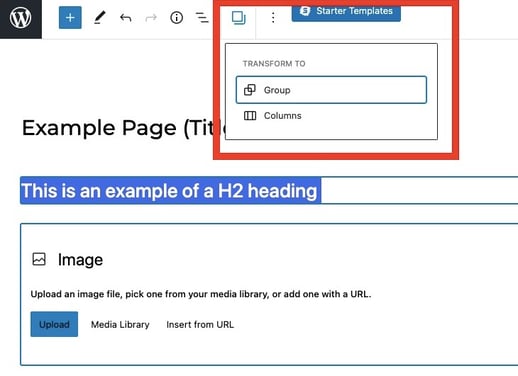
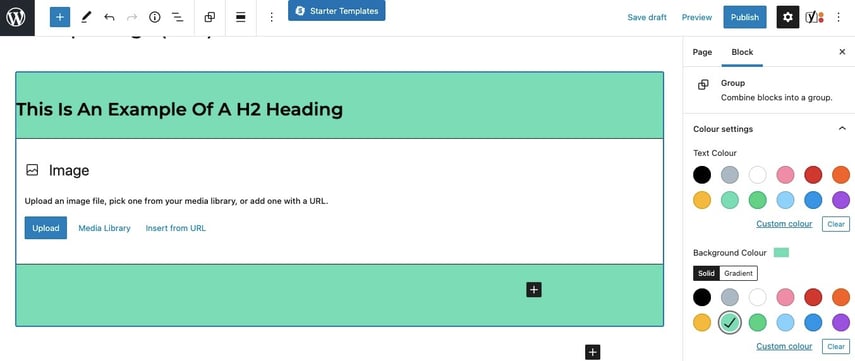
As you build a website on Wordpress from scratch you may have multiple blocks that work together to make a section. For example you might have a header block, three paragraphs and an image and you want them to all sit on a coloured background to make them stand out. You can do this by grouping them together. To do this, you highlight the heading, the paragraphs and the image and then in the top toolbar you click the little overlapping squares and transform to group. Now, you can still edit each block within the group individually but you can also click on the group as a whole and change the background colour of the entire group without affecting anything else on the page. Just like this one is (Heading 'Groups', paragraph and 2 images).
Hopefully this is enough to get you off the starting blocks and at least give you a bit of an idea of what's what ,so you feel a bit more confident having a play around with Wordpress! And that really is the best way! Take a couple of days to play around with the site and get used to the layout and tools.
This is quite a long and potentially overwhelming post so feel free to bookmark it and come back to it as and when you need to! I've really only skimmed the surface of what you can do with your site/blog when you build a Wordpress website from scratch! Honestly though, you really will get the hang of it! There might be times when you get frustrated that an image won’t do what you want it to or everything goes skewiff in mobile preview but just have a little patience and it’ll get there! My site as you can see is really simple, there is nothing fancy here just a homemade space!